
5 Easy Rock Art Tutorials to Transform Your Garden Decor

Staring at the same old garden gnome (no offense, Gary) or that slightly wonky birdbath can get… well, boring. You want personality! You want charm! You want something that screams “I have fun and my garden rocks!” (Pun absolutely intended). But who has the time or budget for fancy sculptures? Enter the humble garden rock – nature’s blank canvas, just waiting for a little artistic TLC.
I’ve been turning boring stones into garden gold for years. It started because, frankly, I killed more plants than I cared to admit and needed something pretty that wouldn’t wilt under my questionable green thumb. Rock art became my gardening lifeline. It’s cheap, crazy easy (even if you think you can’t draw a stick figure), and the results are seriously satisfying. So, grab a cuppa, maybe a smooth rock you tripped over last week, and let’s dive into 5 stupidly simple ways to transform your garden decor!
Tutorial 1: The Whimsical Critter Crew (Ladybugs, Bees & Friends!)
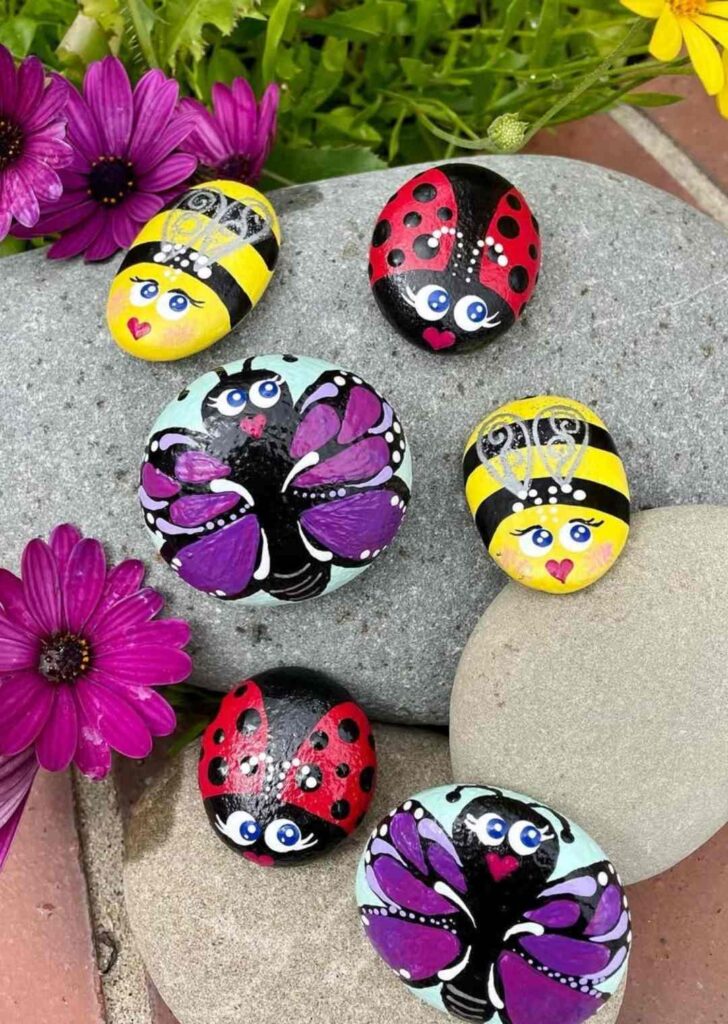
- Why You’ll Love It: Instant charm factor. Kids adore these (and making them!). They add pops of color and feel super friendly. Plus, painting a ladybug is basically just dots. You can do dots, right?
- My Personal Fave: Ladybugs. They’re iconic, easy, and I swear they make my roses bloom better. (Okay, maybe not, but it feels like they do!).
- Gather Your Gear:
- Smooth, rounded rocks (river rocks are perfect)
- Acrylic paints (Red, black, white, yellow – basic colors)
- Paintbrushes (small round tip, medium flat tip)
- Outdoor sealant (Clear, matte or gloss – this is non-negotiable unless you want your art to wash away!)
- Optional: Googly eyes for extra silliness.
- Let’s Get Painting!
- Clean & Dry: Scrub your rock with soapy water, rinse well, let it dry completely. Paint hates dirt and moisture.
- Base Coat: Paint the entire rock your main color (e.g., red for a ladybug, yellow for a bee). Let it dry completely. Seriously, wait. Patience is a virtue, especially with paint. Apply a second coat if needed.
- Details Time! For a ladybug: Paint a black line down the center (the wing split). Paint the head end black. Add black spots! For a bee: Paint black stripes across the yellow body. Paint the head end black. Add tiny white wings.
- Faces: Tiny dots of white for eyes, a tiny black dot in the white for pupils, maybe a little smile. Or glue on googly eyes! Go wild.
- Seal It Up: Once everything is bone dry (overnight is safest), spray or brush on 2-3 thin, even coats of outdoor sealant, letting each dry as per instructions. This protects your masterpiece from rain and sun.
- Garden Placement: Tuck them near flowers, peek out from under leaves, sit them on a garden stake. They look adorable nestled among greenery.
Tutorial 2: Words of Wisdom (Or Just Silly Sayings!) Rocks
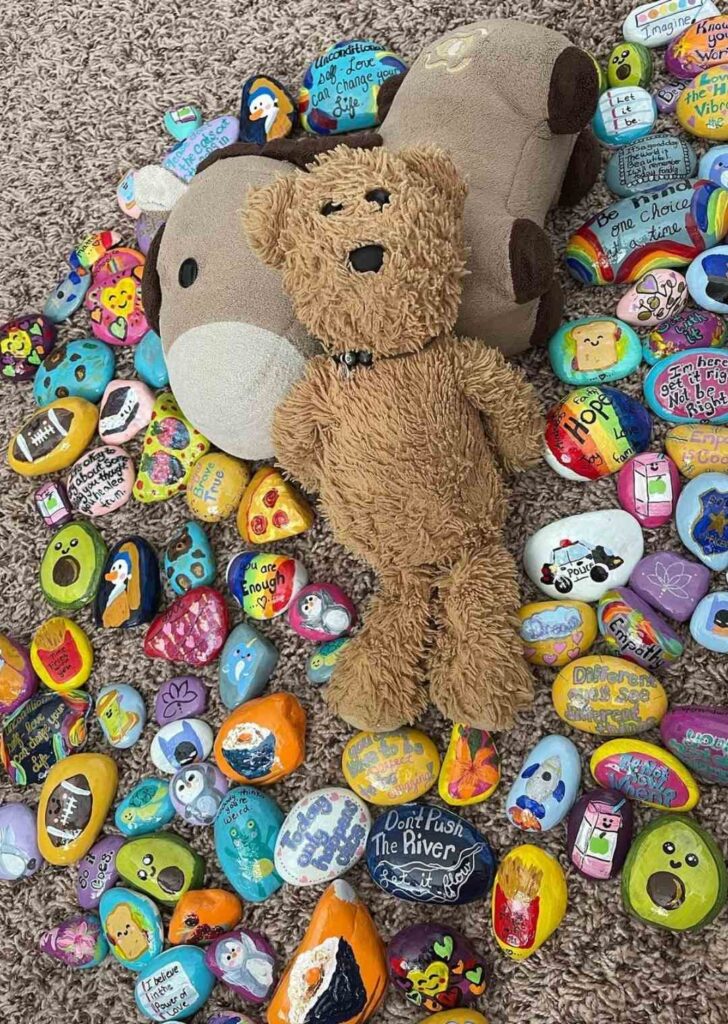
- Why You’ll Love It: Instant mood booster! A little inspiration (“Grow,” “Breathe,” “Dream”) or a giggle (“Go Away, Weeds!,” “Plant Nerd Lives Here”) goes a long way. Super customizable to your vibe.
- My Go-To Trick: Use stencils or stickers if your handwriting looks like a drunk spider crawled across the page (like mine sometimes does!).
- Gather Your Gear:
- Flattish rocks (easier to write on!)
- Acrylic paints (Contrasting colors – dark paint on light rocks, light paint on dark rocks)
- Paintbrushes (Fine detail brush OR small round brush)
- Outdoor Sealant
- Optional: Stencils, vinyl letter stickers, paint pens (Sharpie brand works well), pencil.
- Let’s Get Painting!
- Prep: Clean and dry your rock thoroughly.
- Background (Optional): Paint a solid base color if you want your words to really pop against something other than the natural rock. Let it dry completely.
- Plan Your Words: Lightly sketch your word or phrase with a pencil, or position your stencil/stickers. Keep it simple! Short words or phrases work best.
- Paint/Write: Carefully paint over your pencil marks, fill in your stencil, or trace around stickers. If using paint pens, just write directly on the rock (or base coat). Go slow and steady.
- Sticker Removal: If using stickers, peel them off gently while the paint is still slightly tacky (not wet!).
- Seal: Seal thoroughly once dry. You don’t want your wisdom washing away!
- Garden Placement: Lean them against pots, place them prominently on a garden bench, line a pathway. They’re perfect little focal points.
Tutorial 3: Glow-in-the-Dark Galaxy Magic
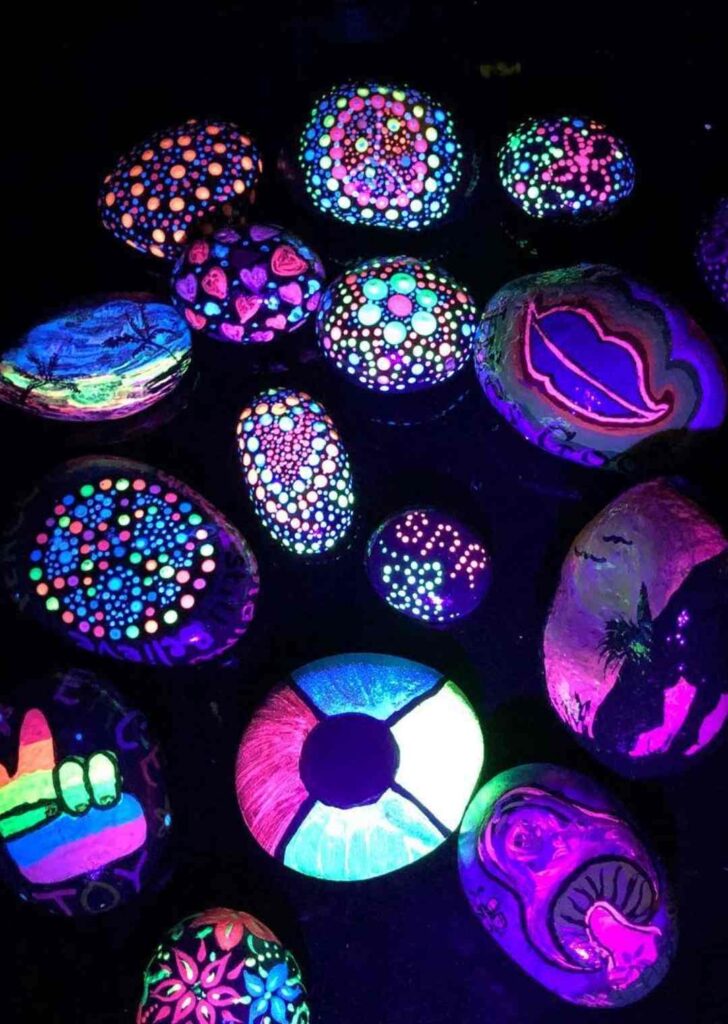
- Why You’ll Love It: Adds a whole new dimension to your garden – literally! These come alive at dusk, creating a magical, starry-night effect. Kids (and let’s be honest, adults too) go nuts for them.
- Pro Tip I Learned: Mix the glow powder really well into the paint or Mod Podge for the best, longest-lasting glow.
- Gather Your Gear:
- Smooth rocks (darker rocks make the glow pop more dramatically!)
- Glow-in-the-dark powder (Find this at craft stores or online)
- Acrylic paint (Black, dark blue, purple)
- Clear acrylic medium (Like Mod Podge) OR clear outdoor paint
- Paintbrushes (Small round, maybe a fan brush for stars)
- Outdoor Sealant (Clear)
- Let’s Get Painting!
- Prep: Clean, dry rock. Obviously.
- Base Universe: Paint the entire rock black, deep blue, or purple. Let dry completely.
- Make the Glow Goo: Mix your glow powder into either:
- A small amount of clear acrylic medium/Mod Podge OR
- A small amount of clear outdoor paint.
Aim for a thick, paste-like consistency. More powder = brighter glow.
- Create Your Stars & Galaxies: Dip your small brush into the glow mixture and dot stars randomly across the rock. Use a slightly bigger blob for planets or tiny streaks for comets. Get cosmic!
- Charge & Seal: Let your galaxy dry completely. “Charge” it under a bright light or sunlight before placing it out at dusk to see the magic! Once dry, seal the entire rock with clear outdoor sealant to protect the glow layer.
- Garden Placement: Place these strategically along paths, near seating areas, or tucked into flower beds where they’ll catch the last rays of sun. The surprise reveal at night is the best part! 🌌
Tutorial 4: Simple & Stunning Rock Mosaics
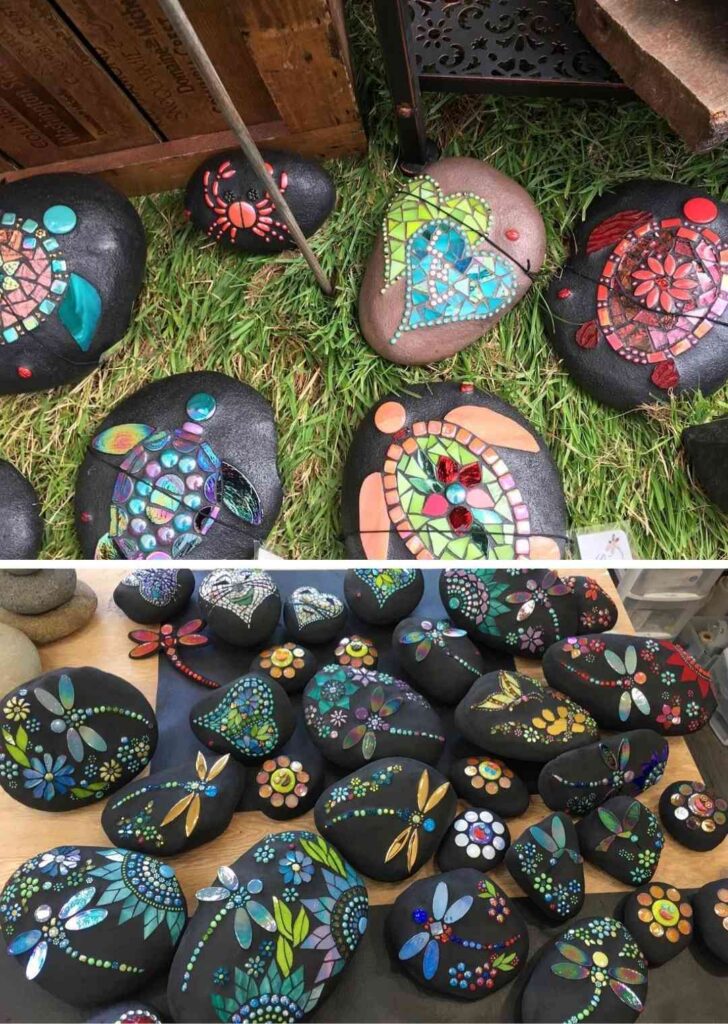
- Why You’ll Love It: Looks incredibly sophisticated but is just arranging rocks! Perfect for covering boring plant pot bases or creating unique stepping stones. Zero painting skills required.
- My Experience: Starting small (like a pot topper) is way less intimidating than tackling a whole path section. Build your confidence!
- Gather Your Gear:
- Base: Terracotta pot saucer, concrete stepping stone blank, sturdy piece of wood.
- Lots of small rocks, pebbles, sea glass, or broken ceramic pieces (tesserae).
- Outdoor adhesive (Like Weldbond or Liquid Nails – make sure it’s weatherproof!).
- Grout (Sandeed or unsanded, outdoor-rated).
- Grout sealer.
- Optional: Safety glasses, gloves, sponge, bucket.
- Let’s Get Crafting!
- Prep Your Base: Clean it thoroughly. Make sure it’s dry.
- Design (or Wing It!): Arrange your rocks/pebbles on the base without glue first. Play with patterns, colors, or just random placement. Find a layout you like. Simple borders or a central sunburst are great starters.
- Stick ‘Em Down: Working in small sections, apply a thin layer of adhesive to the base. Press each rock/pebble firmly into place. Leave a small gap (about 1/8 inch) between pieces for grout. Let the adhesive cure completely (check the product instructions – usually 24 hours).
- Grouting Time (The Slightly Messy Bit): Mix your grout according to package directions (aim for a peanut butter consistency). Wear gloves! Spread the grout over the entire surface, pushing it firmly down into all the gaps with a squeegee or your gloved fingers. Work the grout in diagonally for best coverage.
- Clean Up: Let the grout set for about 15-20 minutes (until it starts to look hazy). Then, using a damp (not soaking wet) sponge, gently wipe diagonally across the surface to remove excess grout from the tops of the rocks. Rinse your sponge constantly. Be careful not to dig grout out of the joints. Repeat until rocks are clean.
- Seal & Cure: Let the grout cure fully (usually 24-72 hours). Then, apply a grout sealer to protect it from stains and moisture.
- Garden Placement: Use mosaic pot toppers on plain pots, create unique stepping stones, or decorate a bird bath base. Instant art upgrade!
Tutorial 5: Painted Rock Plant Markers (Functional & Cute!)

- Why You’ll Love It: Solves the “what did I plant here?!” mystery while adding charm. Endlessly useful and adorable.
- My Hack: Paint the top half or just the very top edge so the plant name stays visible even if the rock sinks a bit.
- Gather Your Gear:
- Small, flattish rocks (Pointy ones work well too!)
- Acrylic paints
- Fine detail brush or paint pen (Sharpie paint pens are awesome for this)
- Outdoor Sealant
- Optional: Popsicle sticks (to stick in the soil behind the rock if needed)
- Let’s Get Painting!
- Prep: Clean and dry your rocks.
- Base Coat (Optional but Recommended): Paint a solid background color on the area where you’ll write. White or light colors make dark text pop. Let dry.
- Label It: Clearly write the plant name. Use your finest brush, a paint pen, or even a permanent marker (though seal over it well!). Bold, simple lettering works best. Think: “Tomatoes,” “Basil,” “Zinnias.” You could also paint simple veggie/fruit icons!
- Seal: Protect your handy label with outdoor sealant.
- Stabilize (Optional): If your rock is small or the soil is loose, glue it to a popsicle stick before placing it.
- Garden Placement: Stick them right in front of your seedlings or plants in your veggie patch, herb garden, or flower beds. No more guessing games!
Your Garden, Rocked!
See? Told you it was easy! From silly ladybugs to glowing galaxies and handy plant labels, transforming your garden with rock art is seriously achievable. The barrier to entry is basically zero – rocks are free, paint is cheap, and the fun factor is huge. You don’t need to be Picasso; you just need a little willingness to play.
I started with one misshapen ladybug rock years ago, and now I’ve got little painted surprises hidden all over my garden. It brings me joy every time I spot one. So, what are you waiting for? Grab the nearest rock, some paint, and get creative! Your garden (and maybe even Gary the Gnome) will thank you for the company. Happy painting! 😊
Got a rock art masterpiece you’re proud of? Share your pics or ideas below – I’d love to see what you create!