
How to Make an Air Dry Clay Embossed Dish (Easy Tutorial)

Okay, let’s talk clay. Specifically, let’s chat about making those super cute, slightly fancy-looking embossed dishes using air dry clay. You know the ones – perfect for holding rings, keys, or that collection of random buttons you swear you’ll use someday. If you think you need a pottery studio and a mystical connection to the earth to make one, think again. I’m here to show you how to make an air dry clay embossed dish with this ridiculously easy tutorial. Seriously, if I can do it, you definitely can.
I stumbled into air dry clay because, let’s be honest, kilns are expensive and slightly intimidating. I wanted that handmade pottery vibe without, well, the actual pottery part. Air dry clay felt like a friendly handshake into the world of sculpting, and these embossed dishes? They became my go-to weekend project. They look way more complicated than they are, which is always a win in my book. Ready to make something cool? Let’s get our hands dirty (literally).
What’s the Big Deal with Air Dry Clay Anyway?
First things first, why air dry clay? What makes it the cool kid on the craft block right now? Well, its main selling point is right there in the name: it air dries. Shocking, I know. This means no kiln needed, no nervously watching temperatures, just good old-fashioned patience while it does its thing on your countertop.
Compared to its cousins, polymer clay (which needs baking) and traditional ceramic clay (which needs firing at volcanic temperatures), air dry clay is wonderfully low-maintenance. It’s generally super affordable and pretty forgiving for beginners. Make a mistake? Mush it up and try again (within reason, don’t let it start drying!).
Now, is it perfect? Nah. It’s not typically waterproof or food-safe (we’ll talk about sealing later), and it can be a bit more fragile than fired clay. But for decorative pieces like trinket dishes? It’s absolutely brilliant. IMO, it strikes that perfect balance between ease of use and getting a really satisfying result.
Gathering Your Arsenal (aka Supplies)
Alright, before we dive headfirst into clay-covered bliss, you need to gather your tools. Don’t worry, you probably have half this stuff lying around your house already. No need for a massive shopping spree (unless you want an excuse, then by all means…).
Here’s your basic checklist:
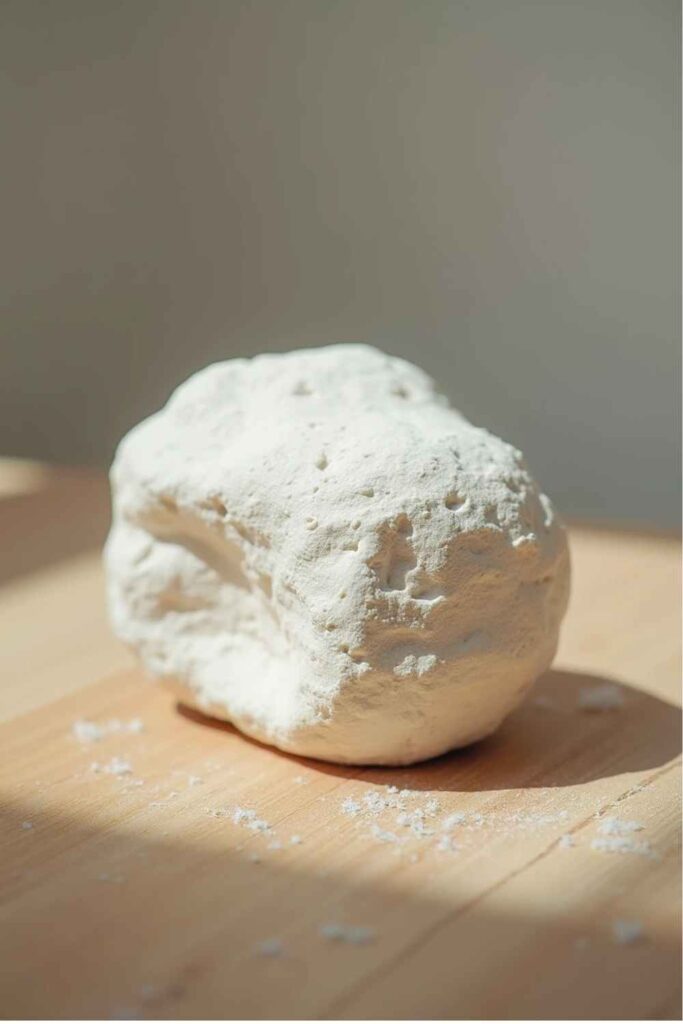
- Air Dry Clay: Duh. There are tons of brands out there. Das, Crayola, Jovi – they all work. I personally lean towards smoother clays like Das for dishes, but experiment and find your fave. A one-pound block is usually plenty for several small dishes.
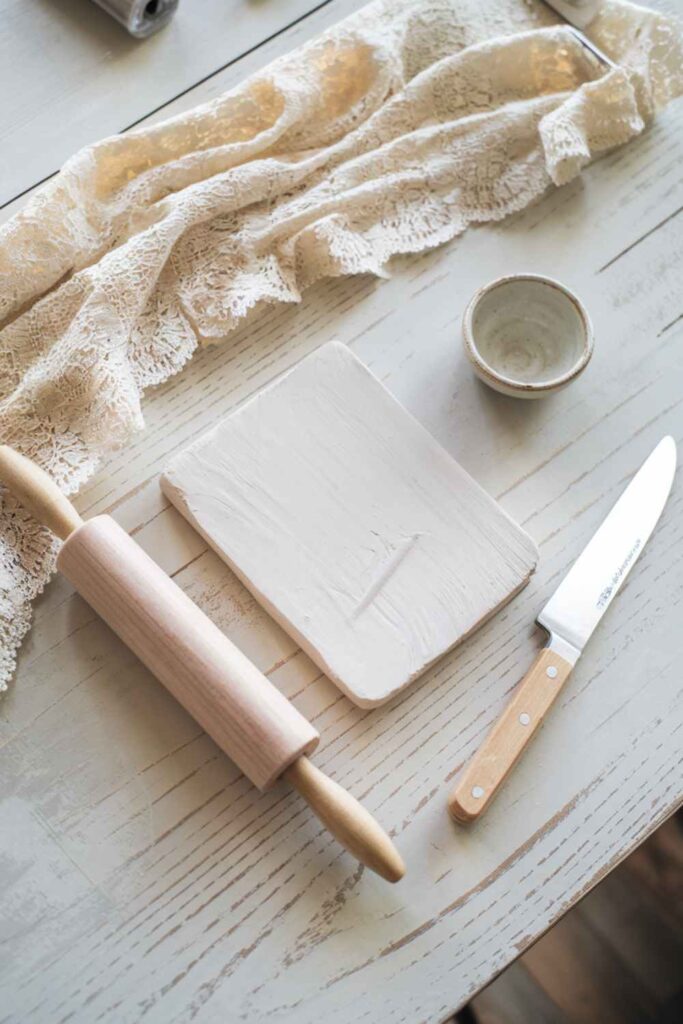
- Rolling Pin: A standard kitchen one works fine. No rolling pin? A smooth glass bottle (like a wine bottle – see, crafting is useful!) does the trick. Just make sure it’s clean.
- Something to Emboss With: This is where the magic happens! Get creative:
- Lace doilies or fabric scraps (my personal favourite for intricate patterns)
- Rubber stamps (make sure they’re clean!)
- Real leaves or flowers (press them gently)
- Textured wallpaper samples
- Anything with a cool raised or indented pattern!
- A Bowl or Dish for Shaping: Find a small bowl, ramekin, or even a saucer with a nice curve that you like the shape of. This will be your mold. The size of the bowl determines the size of your dish. Choose wisely!
- Craft Knife or Clay Tool: Something sharp-ish to cut the clay circle. A butter knife might even work in a pinch, but a craft knife gives cleaner edges.
- Fine-Grit Sandpaper: Optional, but highly recommended for smoothing edges once the dish is dry. Makes it look finished.
- Sealant/Varnish: Absolutely essential. Mod Podge (matte or gloss), clear acrylic spray sealer, or brush-on varnish works. This protects your masterpiece.
- Paint (Optional): If you want to add color. Standard acrylic craft paints are perfect. Metallics look amazing highlighting embossed details.
- Cling Film / Plastic Wrap: Non-negotiable! This stops the clay from sticking to your bowl mold. Trust me on this one.
Got everything? Awesome. Maybe grab a cup of tea or coffee too. Crafting is thirsty work.
The Step-by-Step Guide
Okay, deep breath. Remember, this is supposed to be fun. Don’t stress about perfection. Some of my favorite pieces have little quirks. It adds character, right? Let’s make this air dry clay embossed dish.
Step 1: Prep Your Workspace
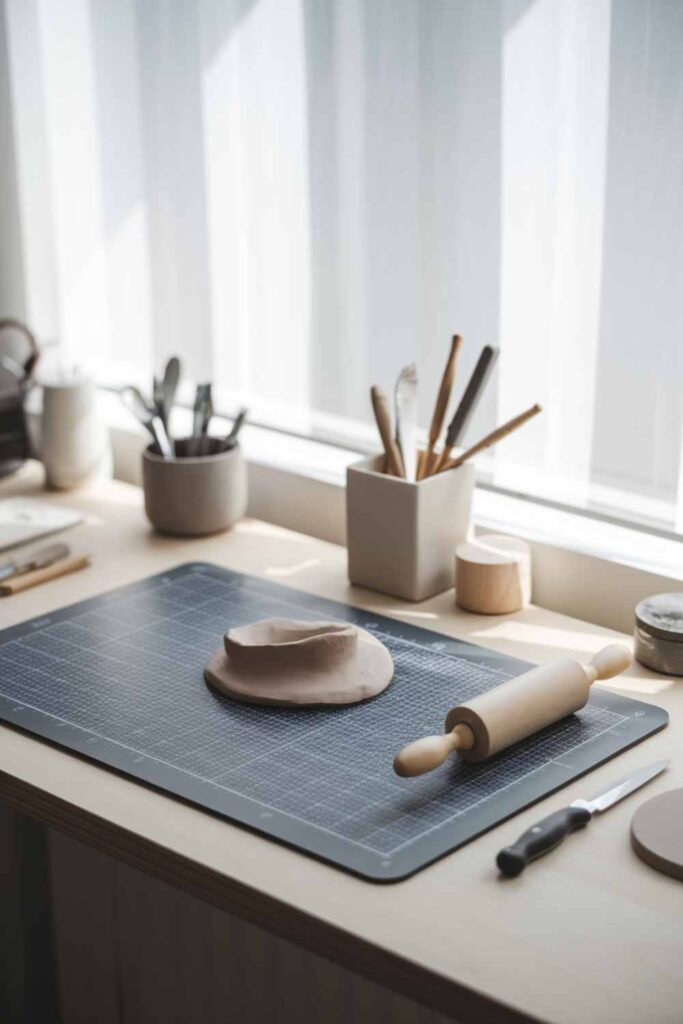
Seriously, do this first. Lay down some newspaper, wax paper, or a silicone craft mat. Air dry clay isn’t super messy, but little bits can get crumbly, and clay dust (later, during sanding) has a knack for traveling. Have all your supplies within arm’s reach. Nothing worse than getting clay on your hands and realizing the cling film is in another room. We’ve all been there. :/
Step 2: Knead That Clay!
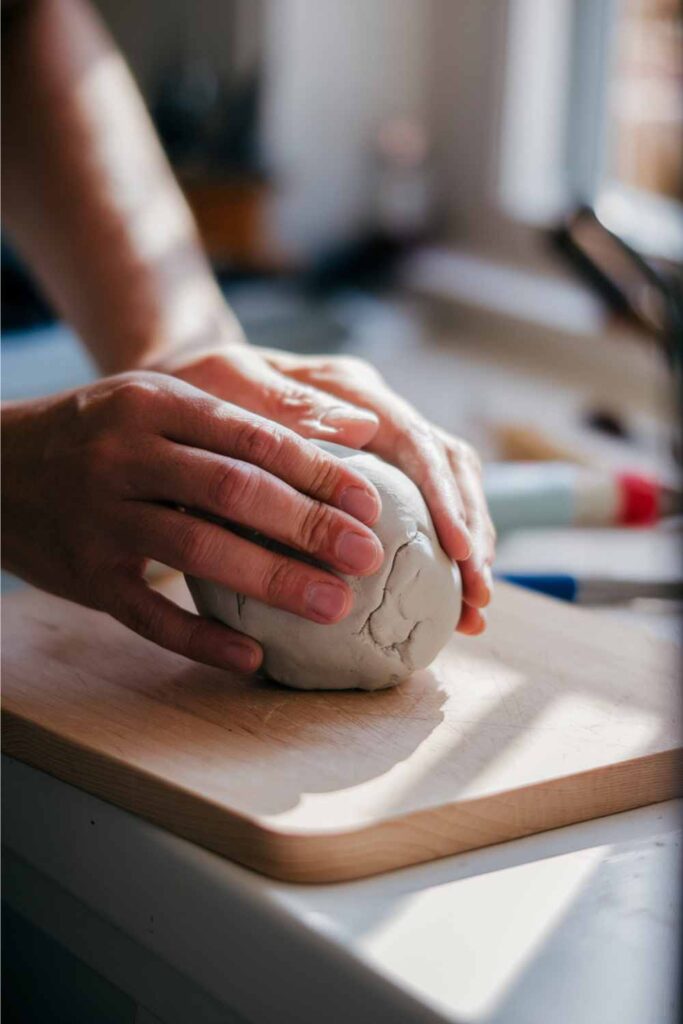
Grab a chunk of clay – maybe about the size of a large fist for a small trinket dish. Before you do anything else, you need to condition it. This basically means kneading it in your hands for a minute or two. It warms the clay up, makes it more pliable, and gets rid of any potential air bubbles hiding inside. Think of it as giving the clay a little massage before its big performance.
Step 3: Roll It Out
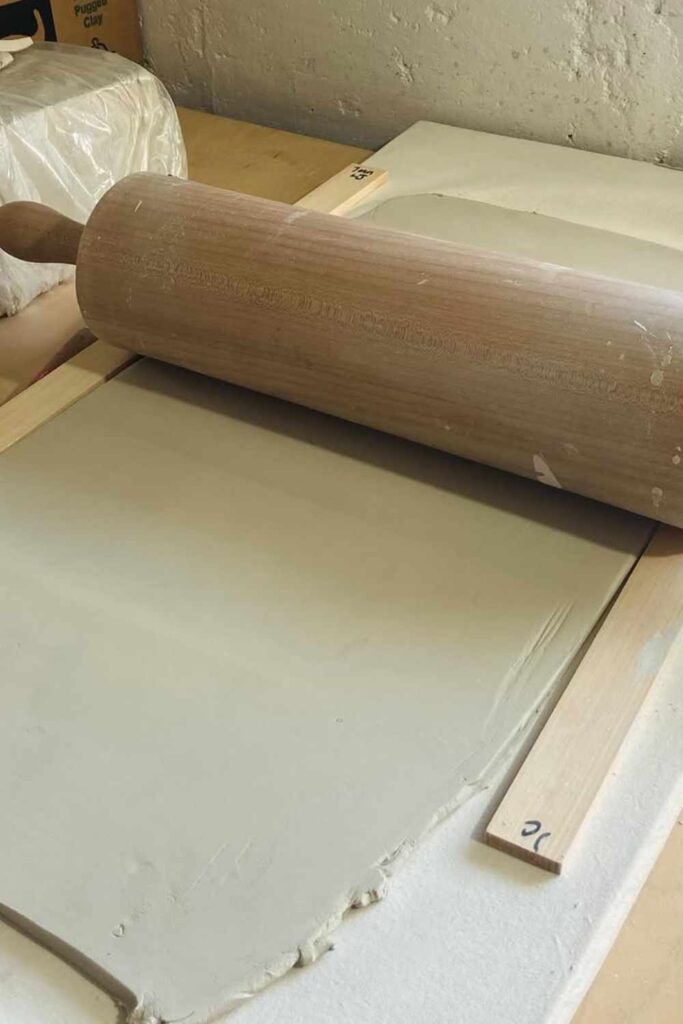
Place your conditioned clay ball onto your protected surface. Now, grab that rolling pin (or wine bottle!) and start rolling it out. Try to get an even thickness, aiming for about 1/4 inch (around 5-6mm). Too thin, and your dish will be tragically fragile. Too thick, and it might take ages to dry and look a bit clunky.
A little trick? Place two identical wooden skewers or thick paint stirrers on either side of your clay as guides for your rolling pin. This helps maintain that even thickness. Rotate the clay occasionally as you roll to keep the shape roughly circular.
Step 4: Time to Emboss! (The Fancy Part)
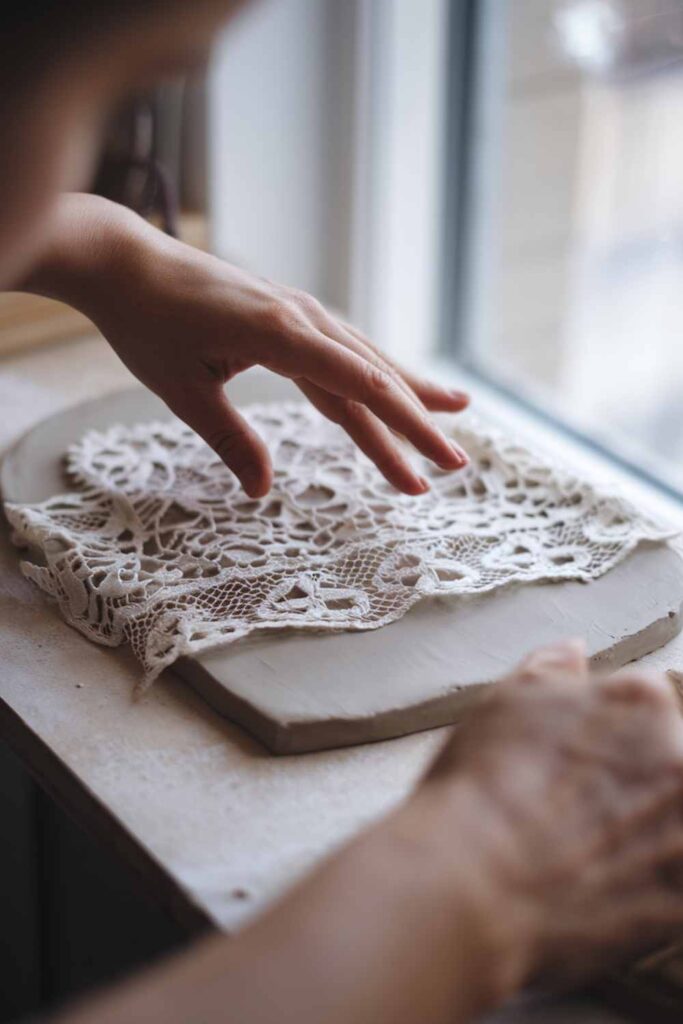
Here comes the fun bit! Choose your embossing tool – your lace, leaf, stamp, whatever. Gently lay it onto your rolled-out clay circle. Now, take your rolling pin and roll over the texture once, applying gentle but firm pressure. You want to press the texture into the clay, not flatten the whole thing out.
After your single, decisive roll, carefully peel back the texture. Lift it straight up if possible. And ta-da! You should have a beautiful pattern embossed onto your clay. Isn’t that satisfying? If you’re nervous, try practicing on a small scrap piece of clay first to get a feel for the pressure needed.
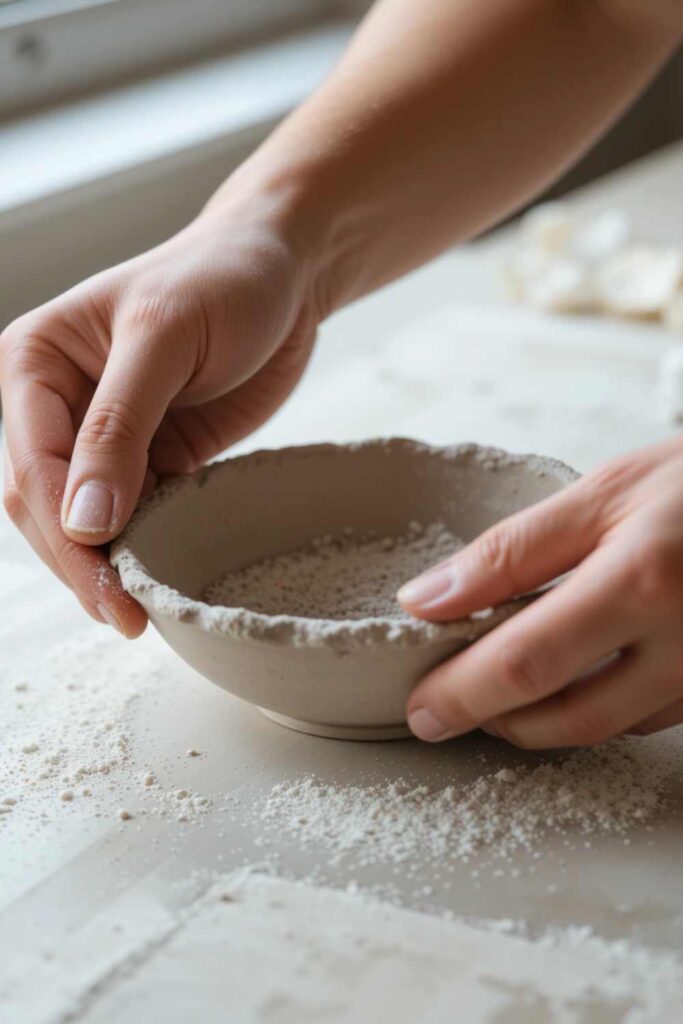
Step 5: Cut Out Your Dish Shape
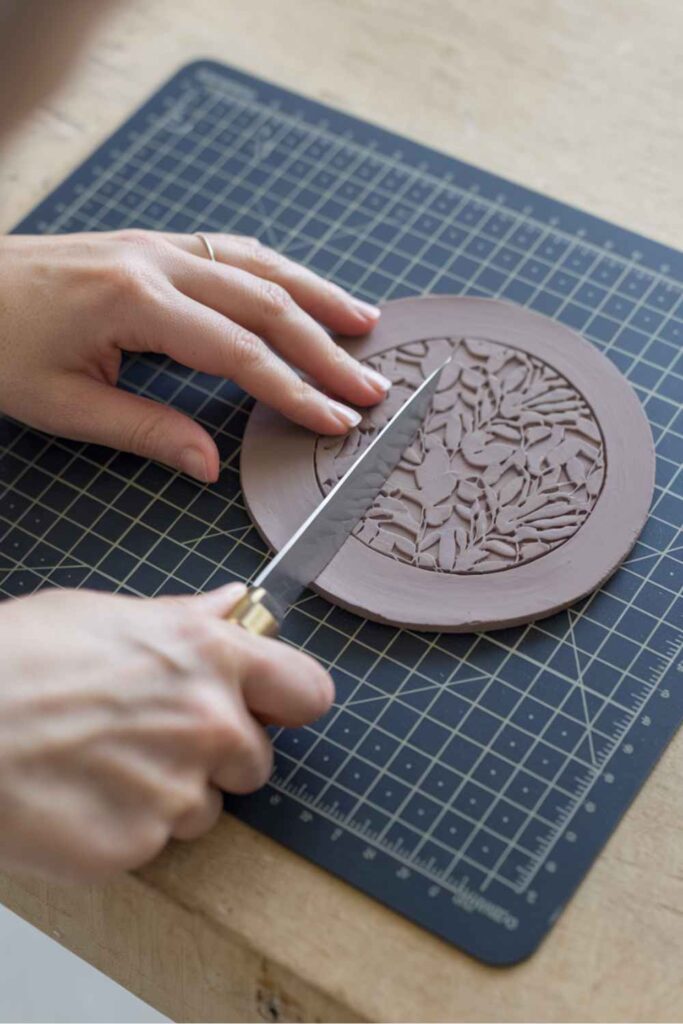
Now, decide how big you want your dish. You can use the rim of the bowl you chose as a mold – just place it upside down on the clay and gently trace around it with your craft knife. Or, if you’re feeling adventurous, cut out a circle freehand. Imperfect circles look charmingly rustic!
Once cut, gently smooth the cut edge with your fingertip or a slightly damp sponge. Just a light touch to remove any sharp bits.
Step 6: Shaping Your Masterpiece

Grab the bowl you’re using as a mold. This next step is crucial: Line the inside of the bowl smoothly with a piece of cling film. Try to get as few wrinkles as possible, as deep wrinkles might transfer slightly to your clay. The cling film is your release agent – it stops the damp clay from welding itself permanently to your favourite cereal bowl.
Now, carefully lift your embossed clay circle (pattern side up!) and gently place it inside the cling film-lined bowl. Use your fingertips to lightly press the clay down so it conforms to the curve of the bowl. Be gentle! You don’t want to squash that lovely pattern you just made.
Step 7: The Waiting Game (Patience, Grasshopper)
And now… we wait. Air dry clay needs time to, well, air dry. Place your bowl (with the clay inside) somewhere safe, out of direct sunlight or intense heat (which can cause cracking). Drying time varies wildly depending on the clay thickness, brand, and your home’s humidity. Expect it to take anywhere from 24 to 72 hours. Yes, really.
You’ll know it’s drying because the color will lighten, and it will feel cool to the touch initially, then gradually reach room temperature. After about 24 hours, check if the edges feel firm. If they do, you might be able to very carefully lift the clay dish (using the cling film) out of the bowl and flip it over onto your drying rack or surface to help the bottom dry evenly. If it feels floppy or fragile AT ALL, leave it in the bowl longer.
Resist the urge to poke it every five minutes. Seriously. Just let it be. Go watch a movie. Read a book. Stare wistfully out the window. It’ll get there. What’s the rush, anyway?
Finishing Touches: Making it Shine (Literally)
Your clay dish is finally hard and dry! It probably looks pretty cool already, but a few finishing touches can elevate it from “homemade craft” to “handmade treasure.”
Sanding (Optional, but Recommended)
Feel the edges of your dish. Are they a little rough? Grab that fine-grit sandpaper (something like 220 grit is good) and gently sand the edges until they’re smooth. You can also lightly sand any bumps on the surface if needed, but be careful not to sand away your embossed pattern! Do this outside or over newspaper, because clay dust is sneaky and gets everywhere. FYI, a mask isn’t a bad idea either.
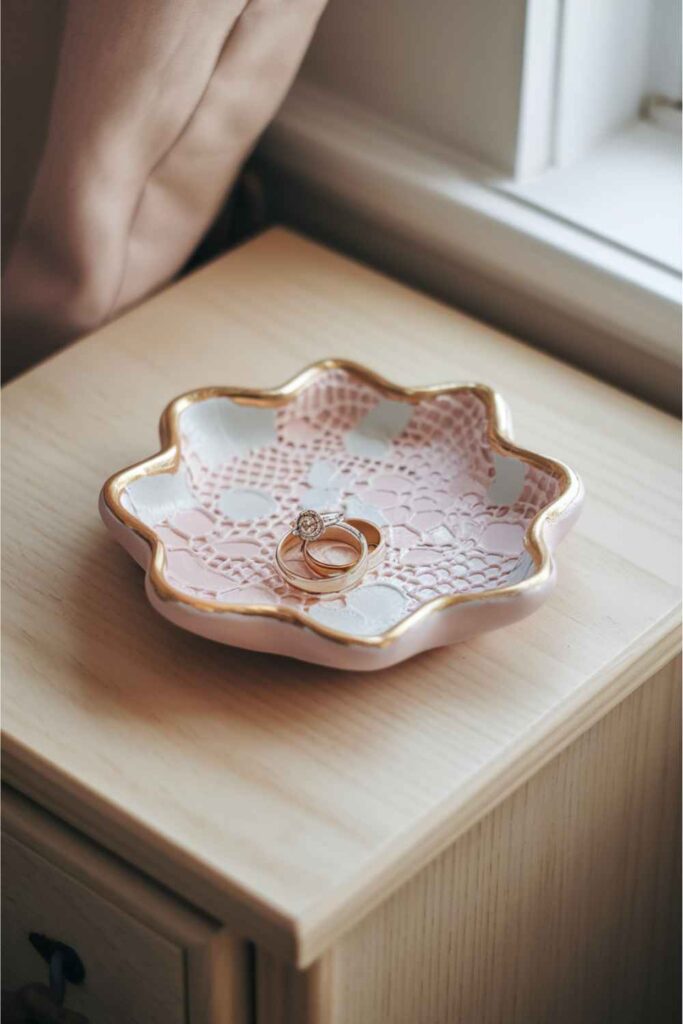
Painting Your Creation (Unleash Your Inner Artist)

If you want a pop of color, now’s the time! Acrylic paints work beautifully on air dry clay. You can paint the whole dish, just the rim, or get fancy and paint inside the embossed pattern to make it stand out. Metallic paints like gold or copper look particularly stunning highlighting textures. Let the paint dry completely according to its instructions – usually doesn’t take too long.
Sealing the Deal (Super Important!)
Okay, listen up, because this step is non-negotiable. Air dry clay, even when fully dry, is porous. It will absorb moisture, get stained, and generally not last very long if left unsealed. You must seal your dish.
Grab your chosen sealant – Mod Podge, clear acrylic spray, or brush-on varnish. Apply a thin, even coat over the entire dish (top, bottom, edges). Let it dry completely (check the sealant’s instructions). Then apply a second coat. I usually do 2-3 thin coats for good measure. Sealing not only protects the dish from minor moisture (like damp fingers) and dust, but it also gives it a nice finished look and can slightly strengthen it.
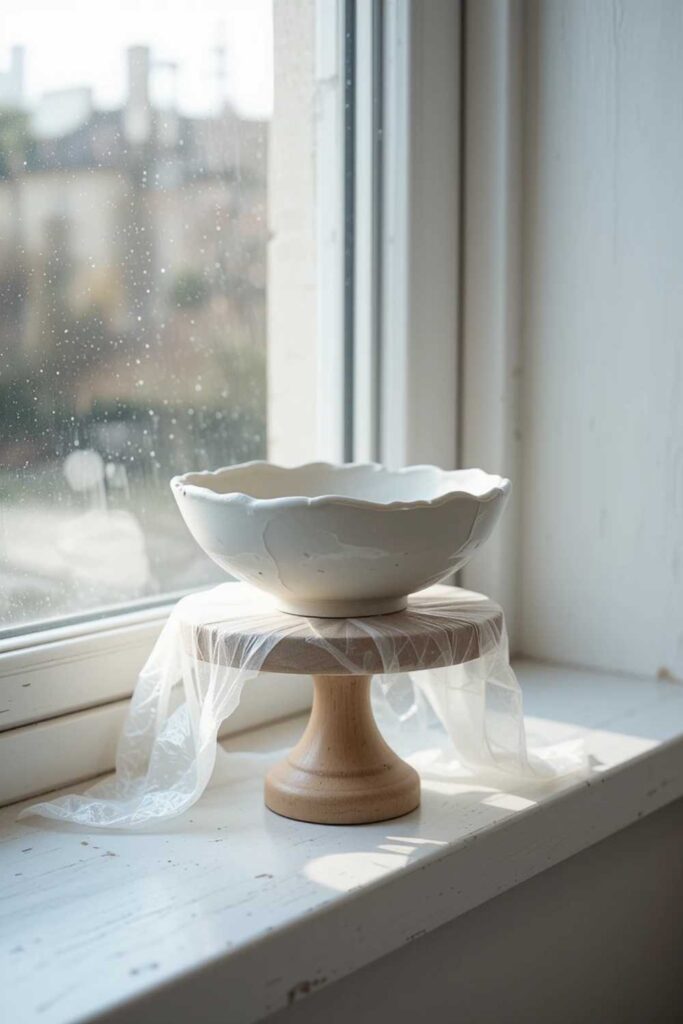
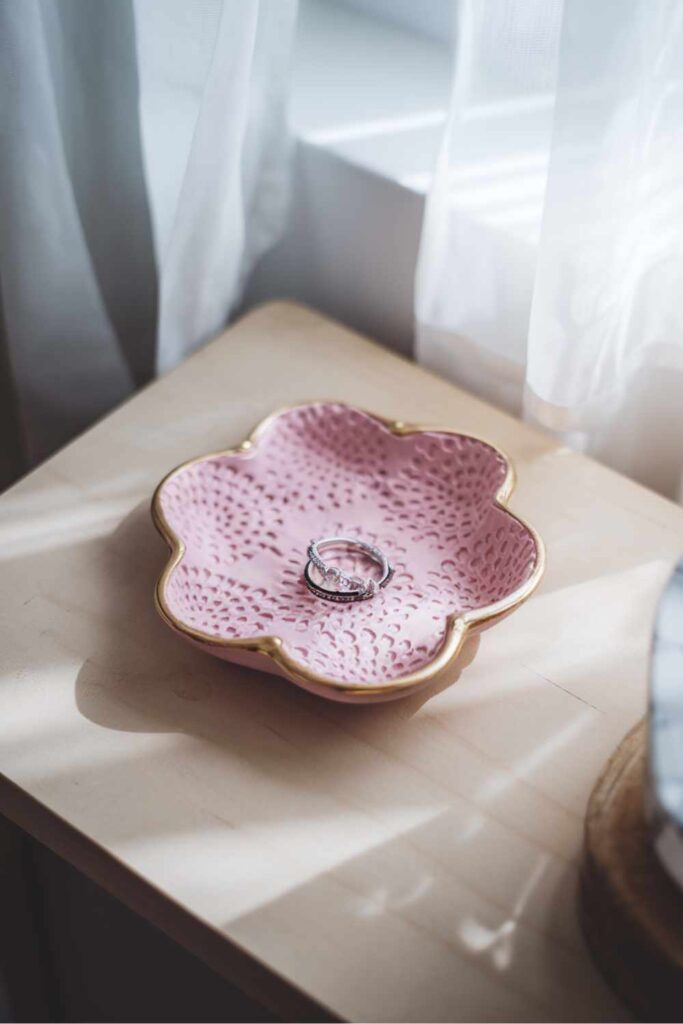
Crucial reminder: Even when sealed, air dry clay is generally NOT considered food-safe or waterproof. Don’t use your beautiful dish for snacks, and don’t submerge it in water. It’s perfect for jewelry, keys, loose change, paperclips, or just looking pretty on a shelf.
Troubleshooting Tips from Someone Who’s Been There
Crafting isn’t always smooth sailing. Sometimes things go a bit wonky. Don’t despair! Here are a few common air dry clay hiccups and how to deal with them:
- Help! My Clay Cracked! Cracking usually happens if the clay dries too quickly (e.g., placed near a heater or in direct sun) or if it was handled or flexed too much while still drying. Minor cracks can sometimes be filled with a bit of clay slurry (clay mixed with water to a paste consistency) or even wood filler, then sanded smooth once dry. Prevention is key: ensure slow, even drying.
- It’s Warped and Uneven! Sometimes, especially with larger or thinner pieces, warping can occur as the clay dries and shrinks slightly. If it’s a flat piece, sometimes carefully placing a light book on it after it’s partially dry can help. For bowls? Honestly, sometimes I just embrace the slight wonkiness. It adds to the handmade charm, right? 🙂
- My Embossing is Barely Visible/A Mess! This usually comes down to pressure. Too little, and the pattern won’t transfer well. Too much, and you might distort the clay or the pattern. Using a texture that’s too subtle or too detailed can also be tricky. The solution? Practice on scrap clay! Get a feel for how your chosen texture and clay interact before committing to your final piece.
You Did It! Now Go Forth and Emboss!
And there you have it! See? I told you it was an easy tutorial. You’ve successfully navigated the world of air dry clay and created your very own embossed dish. How cool is that? You took a lump of earthy stuff and turned it into something beautiful and functional (well, functional for holding tiny, non-food items).
Now you have a gorgeous, handmade dish ready to corral your treasures or be gifted to someone special (who will undoubtedly be impressed by your skills). What texture will you try next? Leaves? Fabric? That weird textured placemat you never liked? The possibilities are endless.
So go on, admire your handiwork. Fill it with something important… like spare change, guitar picks, or maybe just dust bunnies until you decide. You made a thing!
DIY Air-Dry Clay Animal Figurines: 15 Fun Projects
How to Make Air Dry Clay Waterproof