
DIY Mud Kitchen Outdoor Setup: Budget-Friendly Ideas for Your Backyard

Fancy getting your kids off screens and into some glorious, messy, outdoor fun? Building a DIY mud kitchen is the answer, and believe me, you don’t need a builder’s license or a fat wallet to make it happen! Remember being a kid and the sheer, unadulterated joy of making a glorious mess? I’m talking about mud pies so thick they’d challenge a structural engineer, potions brewed from rainwater and dandelions, and a general state of blissful grubbiness. Well, guess what? Kids haven’t changed. They still crave that hands-on, messy play, and frankly, we need them to get outdoors more. Enter the mud kitchen – the ultimate backyard accessory that you can totally build.
Forget those eye-wateringly expensive pre-made versions. We’re going full-on budget-friendly, upcycled-chic, and, dare I say it, even more fun because you made it. Ready to dive into the wonderful world of dirt, water, and repurposed junk? Let’s make some muddy magic happen!
Why Bother with a DIY Mud Kitchen? (The Messy Benefits)
Okay, I hear you. Why dedicate a corner of your precious backyard to, essentially, organised dirt play? Isn’t that what puddles are for? Well, yes and no. A mud kitchen offers a fantastic, focused space for kids to explore, imagine, and learn.
Think about it:
- Sensory Smorgasbord: They get to squish, pour, mix, and splat. It’s a sensory dream come true, crucial for little developing brains.
- Creativity Unleashed: Is it a Michelin-starred restaurant serving petal soup, or a mad scientist’s lab concocting fizzy mud potions? Who knows! The possibilities are endless.
- Nature Connection: It encourages kids to interact with natural materials – soil, water, leaves, stones, flowers. They learn about textures, smells, and maybe even a few creepy crawlies (bonus!).
- Real-Life Skills (Sort Of): They’re measuring (ish), pouring, sharing, and cleaning up (ha! We can dream, right?). It’s pretend play with tangible results.
- It Gets Them Outside! Need I say more? In a world of screens, anything that lures them into the fresh air is a massive win.
Honestly, the small amount of mess is a tiny price to pay for the hours of engaged, imaginative play you’ll witness. Plus, it keeps most of the mud in one designated spot. Mostly.
Scouting for Your Mud Kitchen HQ
Before you start hoarding pallets like a doomsday prepper, let’s talk location. Where will this magnificent mud emporium live? It’s not a decision to take lightly; you’ll want a spot that works for both the mini-chefs and for you.
Consider the Essentials:
- Shade is Your Friend: Kids can get lost in play for hours. Putting the kitchen under a tree or an overhang, or even rigging up a simple tarp, will protect them from the sun. Trust me, a sunburnt, muddy child is not a happy child.
- Water Access: How will the “cooking” happen? Is it near an outdoor tap and hose? Or will you embrace the “fetch and carry” method with watering cans and buckets? Both work, but proximity to a tap makes life way easier.
- Drainage Drama: Mud + Water = Puddles. Will the area drain reasonably well, or will it become a permanent bog? A slightly sloped area or even a base of gravel or woodchips can help prevent a swamp situation.
- Supervision Sightlines: You’ll likely want to keep an eye (or at least an ear) on the proceedings. Can you see the spot from a window or your usual backyard-lounging position?
Choose a spot that feels right – accessible, practical, and, most importantly, ready to handle a bit of delightful chaos.
The Foundation: What Will Your Mud Kitchen Be?
This is where the real DIY fun begins! The base of your mud kitchen sets the stage. You don’t need a carpenter’s license, just a bit of imagination and a willingness to see potential in ‘junk’.
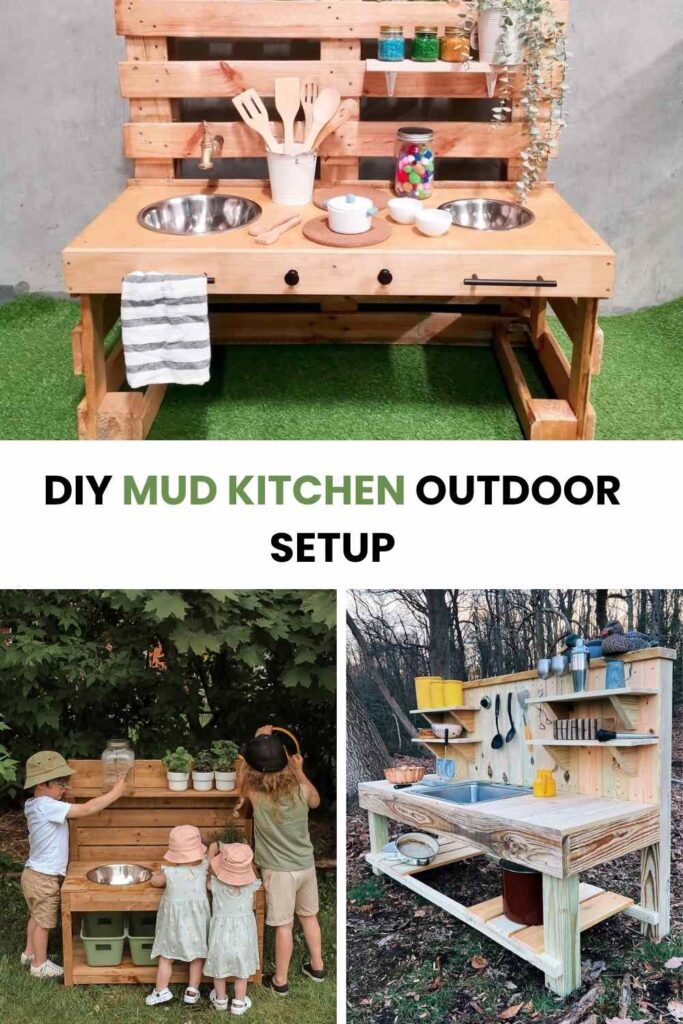
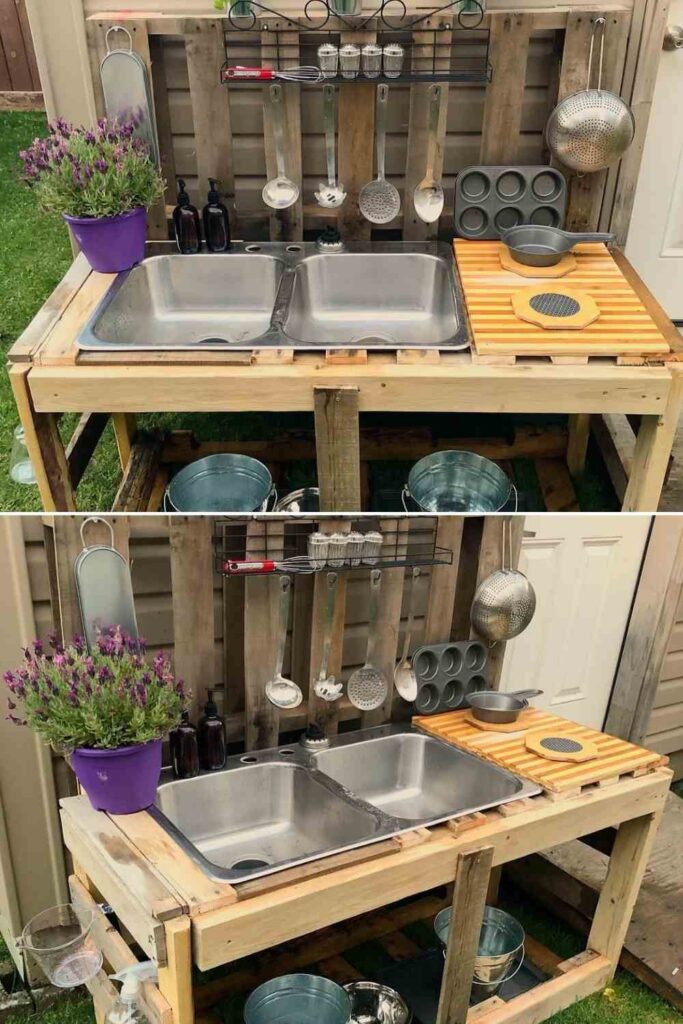
Pallet Power
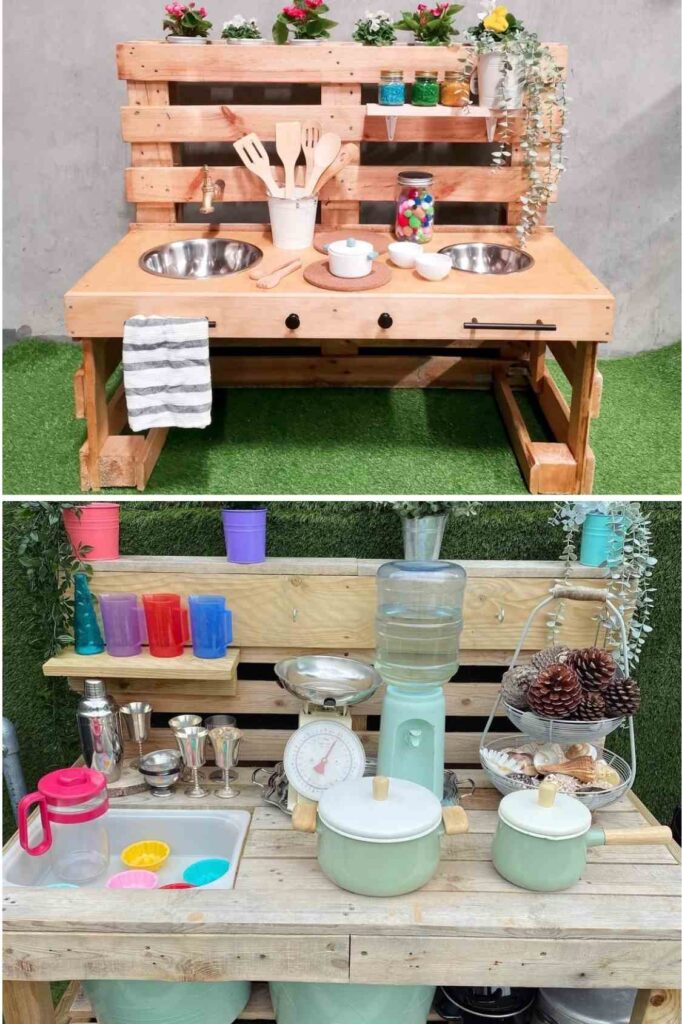
Ah, the humble pallet. It’s the king of budget DIY for a reason. You can often find them for free (check local businesses or online marketplaces – but always ask first!).
- Pros: Usually free/cheap, sturdy, versatile. You can stand them upright for a ‘backsplash’ or lay them flat.
- Cons: They definitely need work. You’ll need to sand them thoroughly to avoid splinters (seriously, don’t skip this). Some might be treated with chemicals you don’t want near kids – look for “HT” (Heat Treated) stamps, not “MB” (Methyl Bromide).
- My Take: I love pallets, but be prepared to put in some elbow grease. The rustic look is hard to beat, though.
Upcycled Treasures
Got an old dresser heading for the dump? A rickety side table? An ancient sink a neighbour is throwing out? Goldmine!
- Pros: Gives old items new life, often has built-in features (drawers, shelves), can look incredibly charming.
- Cons: Might need significant cleaning, repairs, or weatherproofing. Finding the ‘perfect’ piece can take time.
- My Take: This is my favourite route. Our first mud kitchen was a hideous 80s TV cabinet we painted bright blue. It was glorious! Scour garage sales, thrift stores, and curbsides – you never know what you’ll find.
Simple & Sturdy
If a full build feels daunting, think simpler. A couple of cinder blocks and a sturdy wooden plank or two can make a perfectly functional, minimalist mud kitchen.
- Pros: Super easy, incredibly cheap, quick to set up.
- Cons: Can look a bit too basic (unless that’s your vibe), less storage potential.
- My Take: Perfect if you’re short on time or DIY confidence. You can always add more elaborate bits later. It gets the job done!
Gathering Your Mud-Making Arsenal (On the Cheap!)
Once you have your base, it’s time to accessorise. And again, think budget. Kids don’t need shiny new things; they need functional (and preferably unbreakable) stuff.
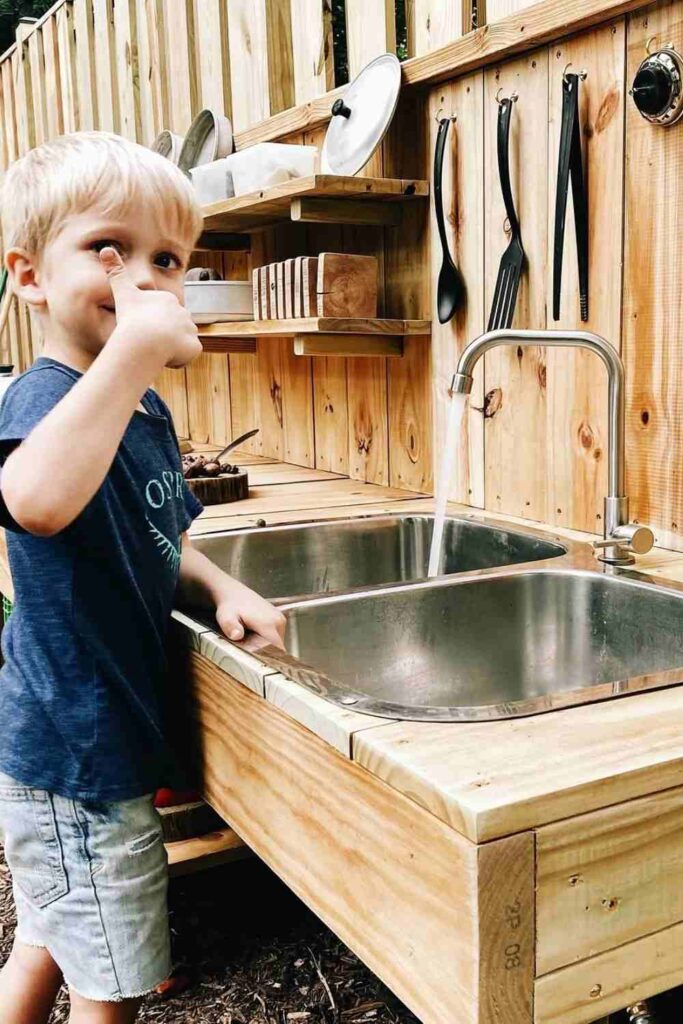
The “Sink” Situation
Every kitchen needs a sink, right? For a mud kitchen, this is usually where the main mixing magic happens.
- Old Metal Bowls: These are perfect. Check thrift stores or your own cupboards. They’re durable and easy to clean (ish).
- Buckets: Simple, cheap, effective.
- Plastic Tubs: Old storage containers work wonders.
- A Real Sink: If you find an old sink during your upcycling hunt, score! You can cut a hole in your countertop and drop it in for that authentic touch. FYI, it looks amazing but isn’t strictly necessary.
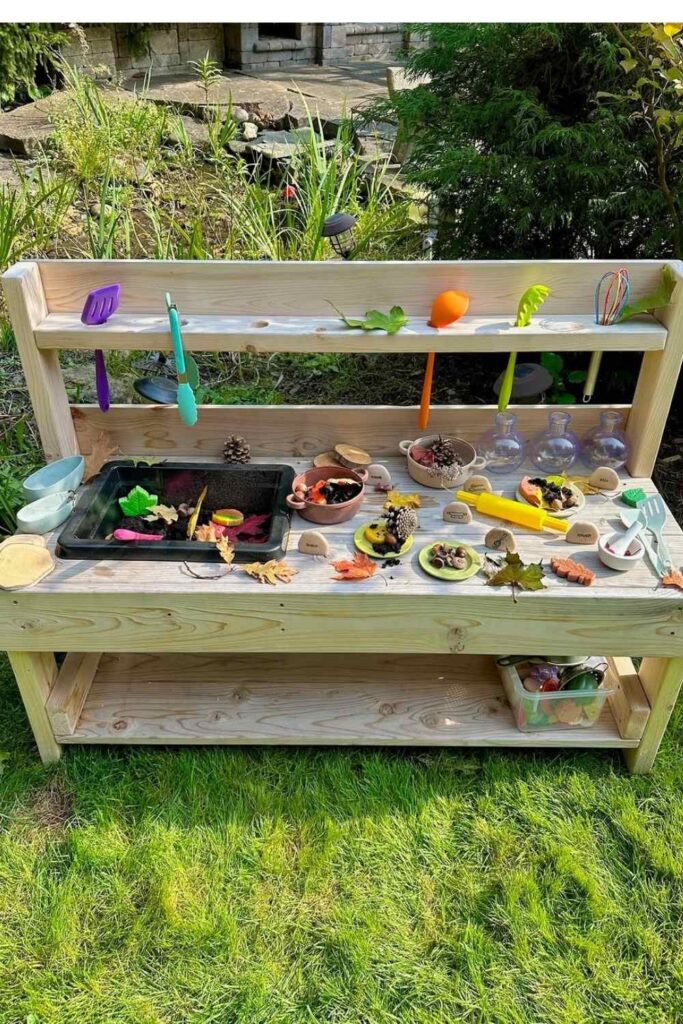
Work Surfaces & Shelving
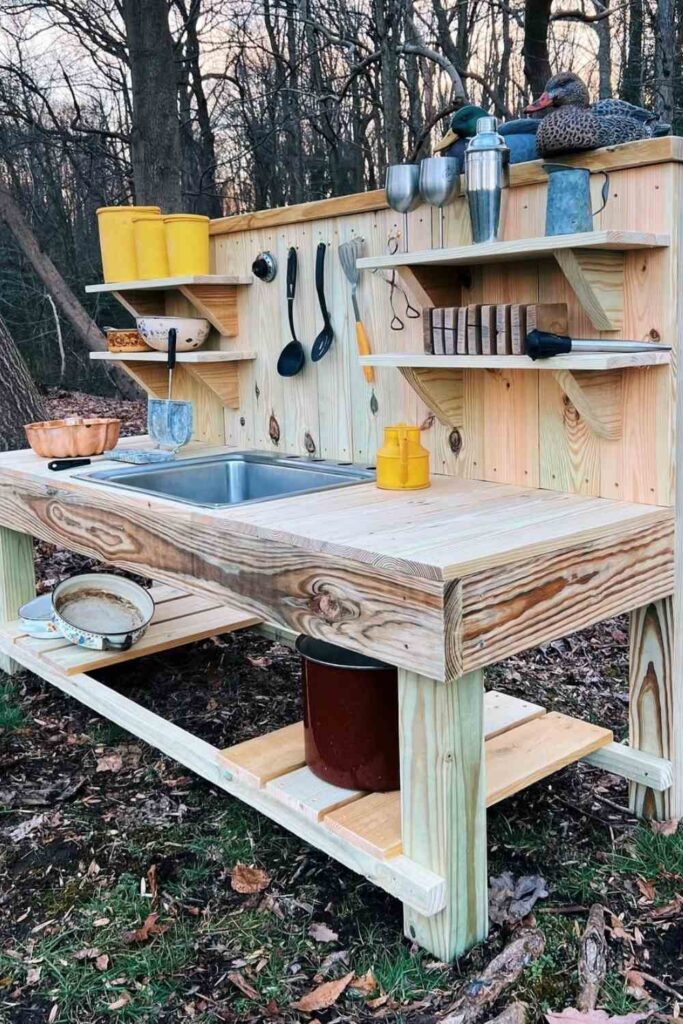
Kids need space to ‘prep’ their mud pies and line up their ingredients.
- Offcuts of Wood: Any leftover planks can be attached as shelves or extra countertops.
- More Pallet Wood: Dismantle a pallet (carefully!) for loads of rustic shelving material.
- Old Crates: Wine crates or fruit boxes can be mounted on their sides to create cubbies.
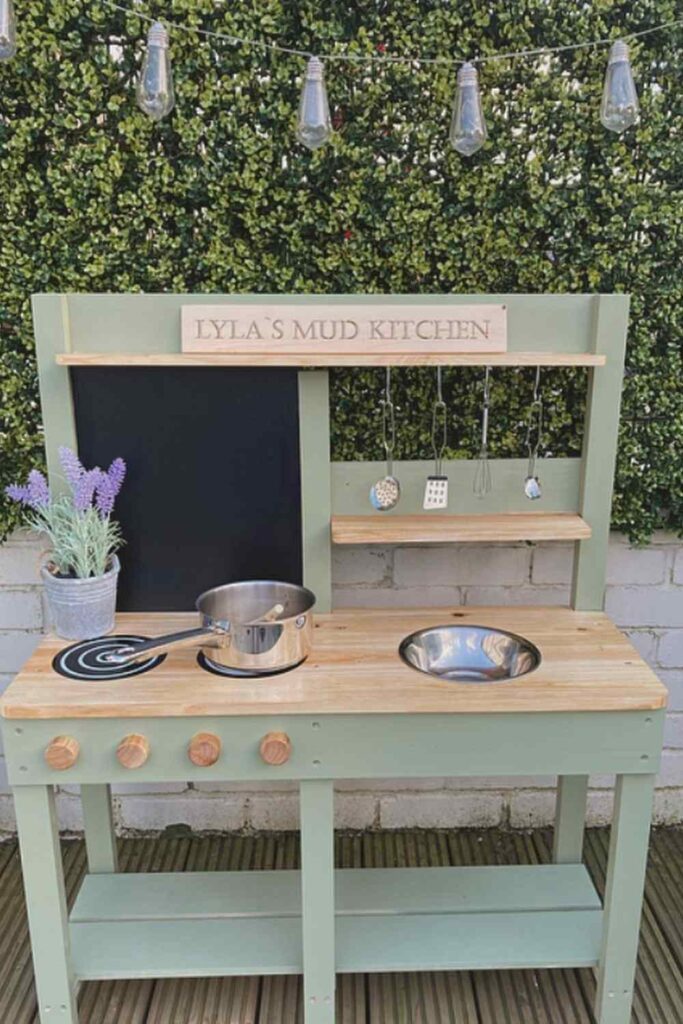
Pots, Pans & Utensils
This is where thrift stores and dollar stores are your best friends.
- Must-Haves: Old metal pots and pans, muffin tins (essential for pies!), spoons, whisks, ladles, jugs, funnels.
- Avoid: Anything breakable (glass) or too precious. It will get dropped, bashed, and filled with mud.
- Pro Tip: Raid your own kitchen for anything you’re about to replace. That scratched-up saucepan? Perfect.
Putting It All Together: The Grand (and Grimy) Assembly
Okay, you’ve got your base and your bits. Time to build! Don’t panic; this isn’t rocket science.
Safety First (Mostly)
Look, it’s a mud kitchen, not a padded cell. But a few precautions go a long way.
- Sand Everything: I’m saying it again because it’s crucial. No splinters!
- Secure It: Make sure your structure is stable. If it feels wobbly, add braces or screw it to a fence (if possible). Kids will lean on it.
- Check for Nasties: Remove any rusty nails, sharp edges, or dodgy-looking bits from your upcycled finds.
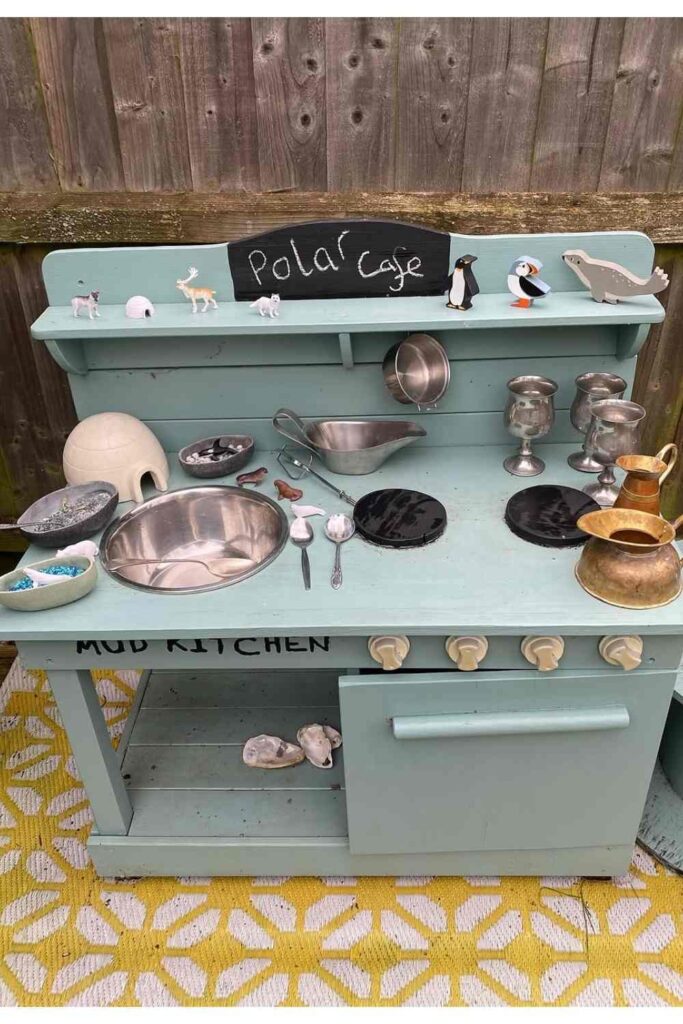
Making It Pretty (Optional, But Fun)

You can leave it rustic, but adding some colour makes it special.
- Paint: Use outdoor-safe, non-toxic paint. Bright colours are fun, or go for a ‘natural’ look. Get the kids involved in painting – they’ll love it (and it’ll hide any dodgy brushstrokes :)).
- Stencils: Add cute patterns or even ‘labels’ for different areas.
- Hooks & Knobs: Screw in some hooks or old drawer knobs for hanging utensils. It looks pro and keeps things (slightly) organised.
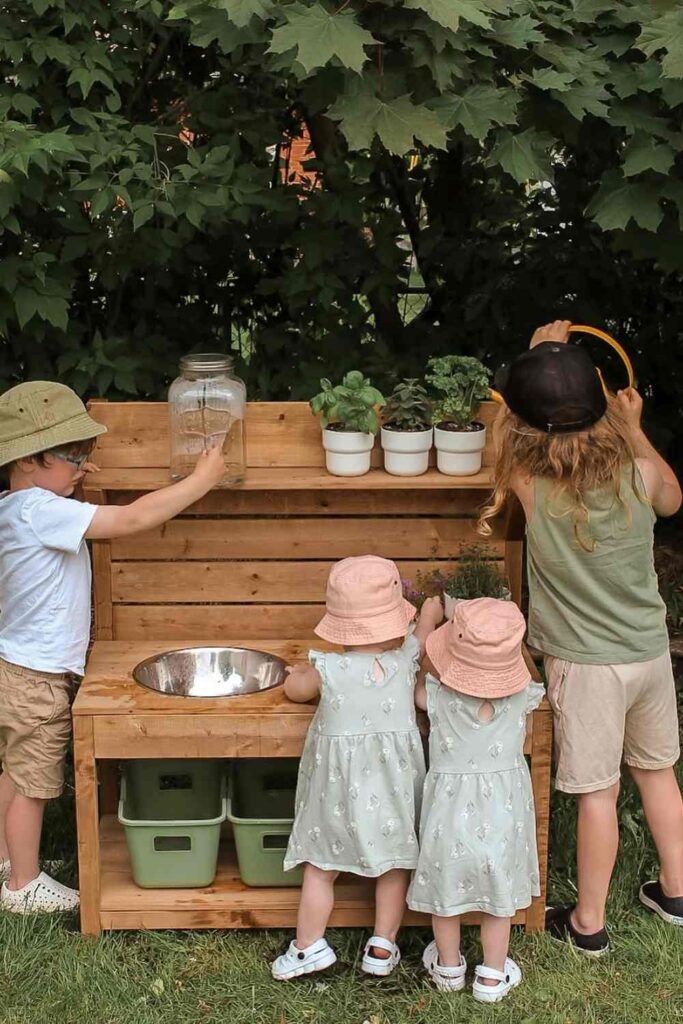
Water Works (Or Not)
How will water get to the sink?
- The Bucket Brigade: The simplest method. Kids fill buckets or watering cans from a tap or water butt. Builds muscles!
- Hose Access: If it’s near a tap, a short hose attachment can provide ‘running water’.
- DIY Water Dispenser: You can get fancy with an upturned water cooler bottle or a drink dispenser with a tap.
Stocking the Pantry: Mud Kitchen Must-Haves
Now for the real ingredients.
- The Obvious: Mud & Water: You’ll need a source of soil (preferably topsoil, not fancy potting mix with chemicals) and access to water.
- Nature’s Bounty: Encourage kids to gather their own supplies: leaves, grass clippings, pebbles, sand, small sticks, fallen petals, seeds. Keep a few buckets handy for foraging missions.
- Fun Extras: Old spice shakers (filled with sand or dried petals), squeezable bottles, measuring cups, and maybe even some food colouring for special occasions can elevate the play.
Keeping the Chaos Contained (Sort Of)
Let’s be real: it’s going to be messy. But you can set a few ground rules.
- Mud Stays Here: Try to enforce a ‘mud kitchen zone’. A border of rocks or logs can help visually define the area.
- Aprons & Old Clothes: Essential attire for any serious mud chef.
- Wash-Up Station: Having a bucket of water and an old towel nearby for hand-washing before they charge back into the house can save your sanity. Or, you know, just hose them down. Whatever works.
Ready to Embrace the Mud?
Building a DIY mud kitchen doesn’t have to be a huge, expensive project. It’s about tapping into your creativity (and maybe your neighbour’s skip bin, with permission!), embracing imperfection, and giving your kids a space to do what they do best: play, explore, and get gloriously, wonderfully messy.
So, what are you waiting for? Have a rummage in the shed, keep an eye out for curbside treasures, and get ready to build the best backyard restaurant/lab/potion factory ever. The mud pies won’t make themselves, you know. Go on, get building – your kids (and your inner child) will thank you for it!
20+ Creative DIY Clay Magnet Ideas: Easy & Unique Crafts to Brighten Your Home